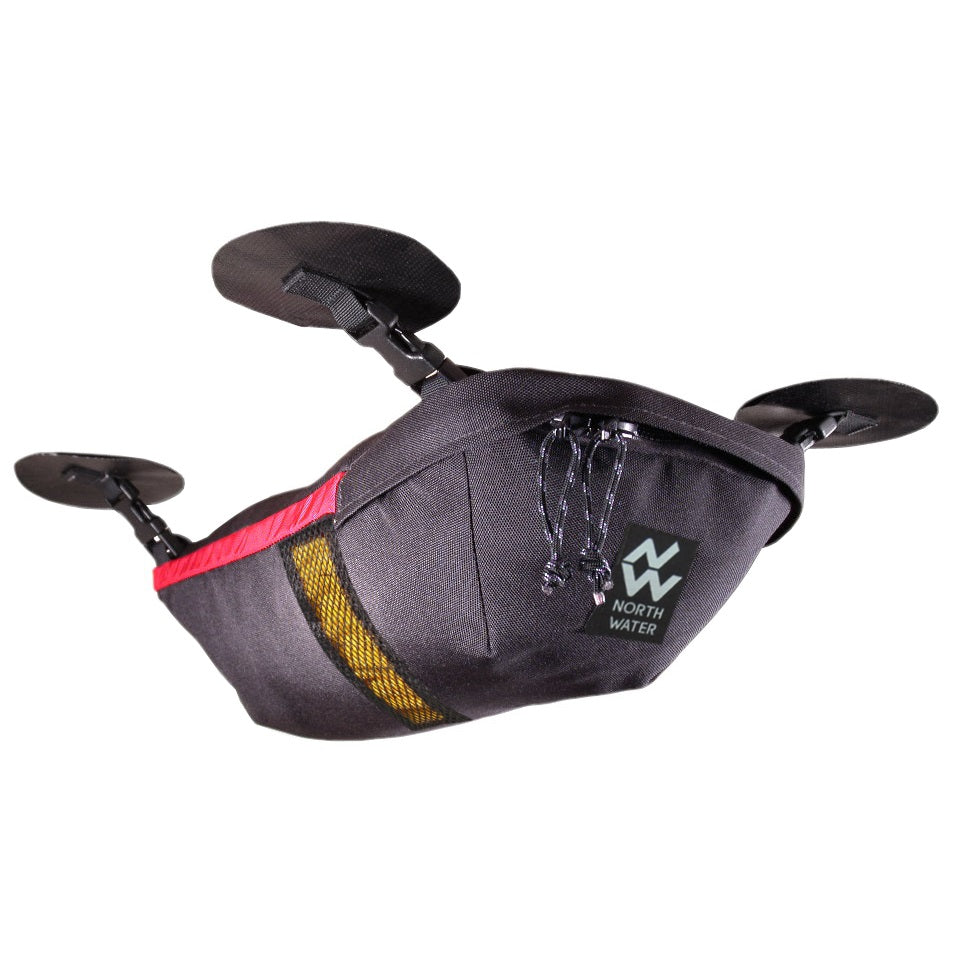
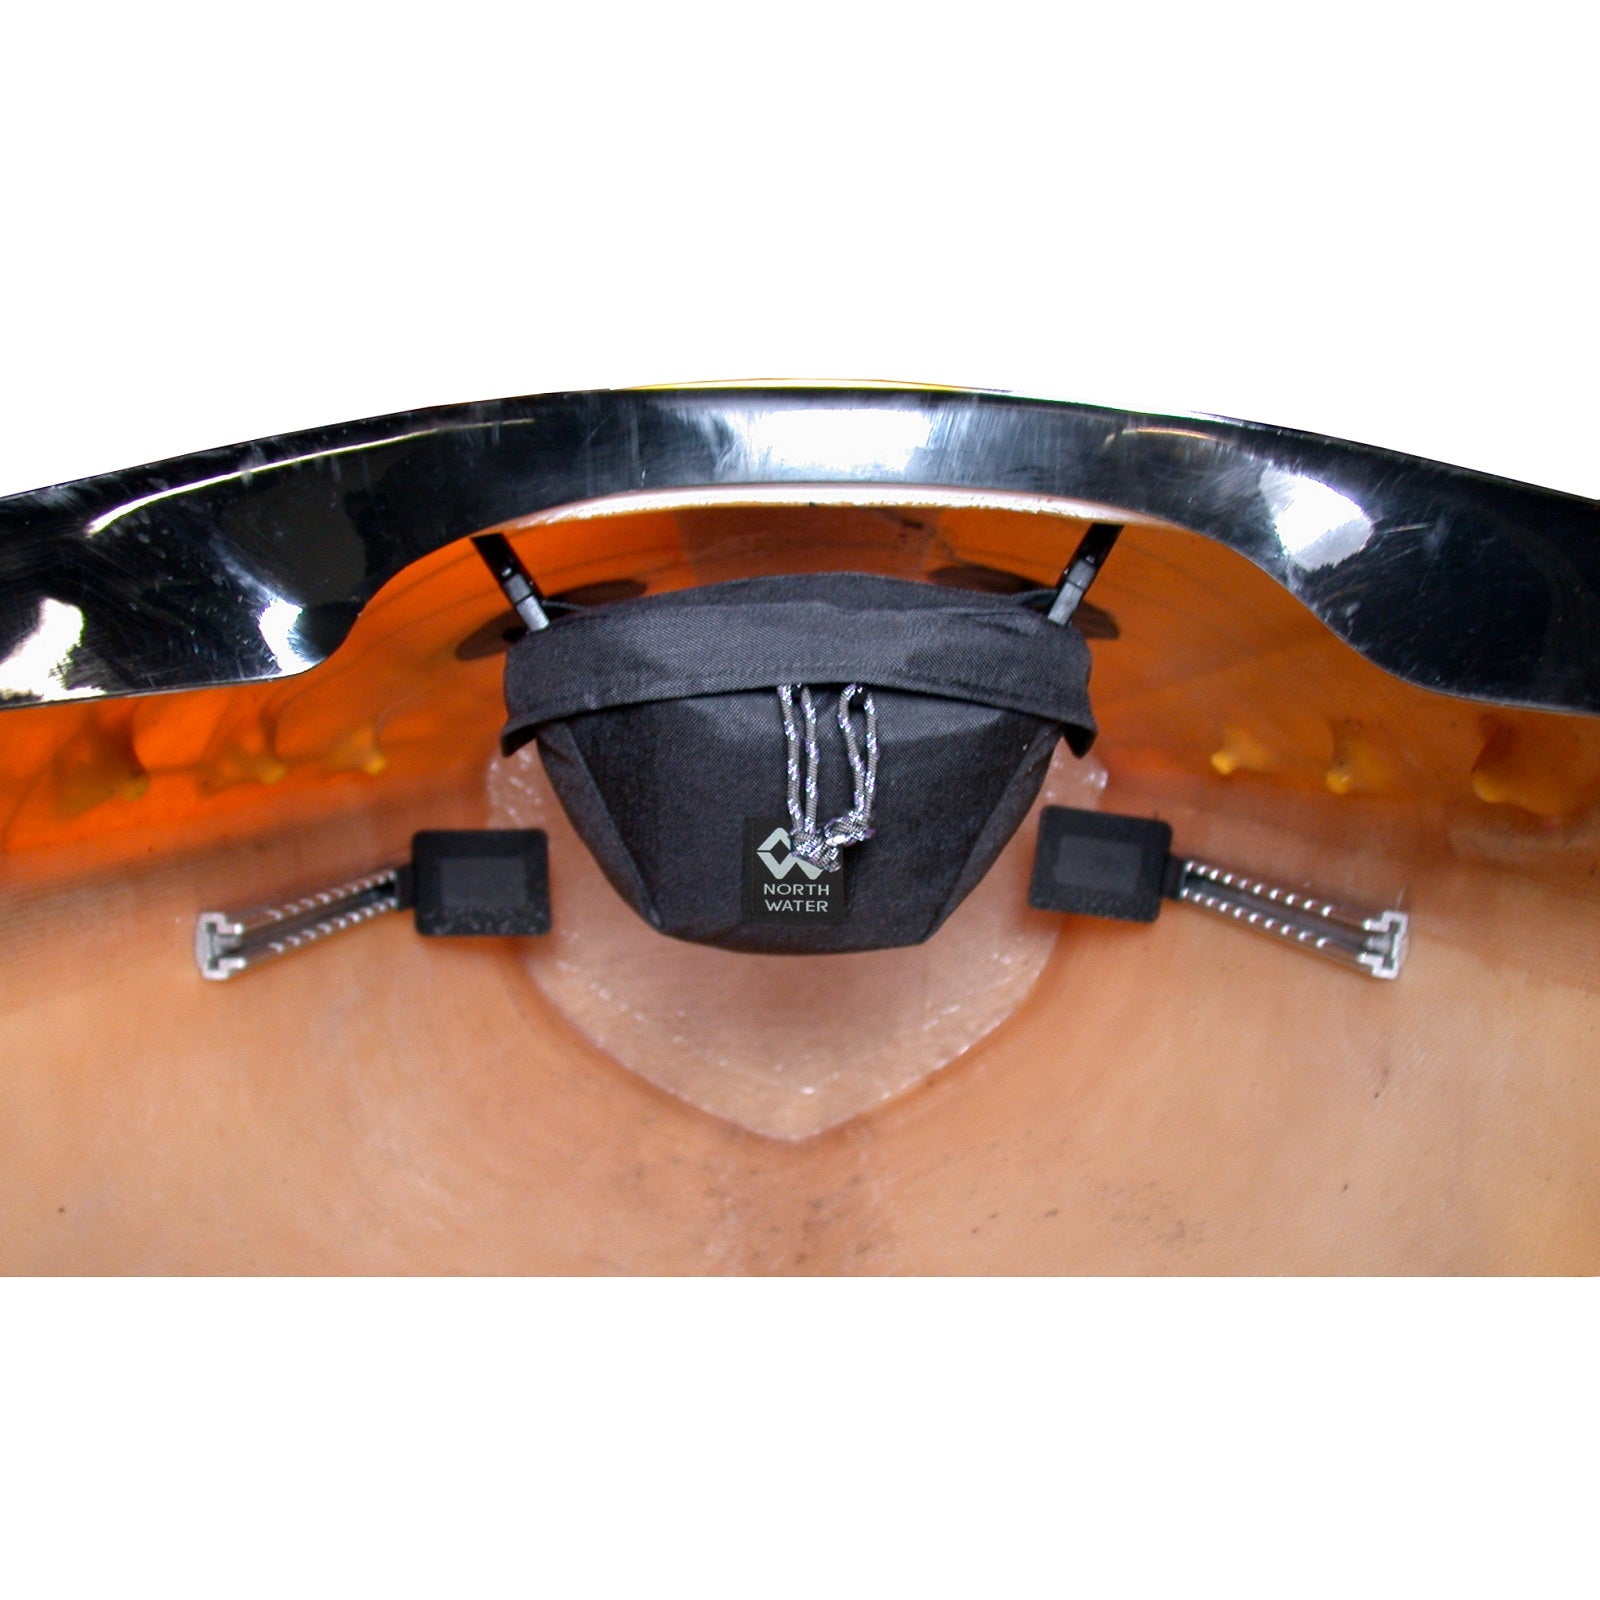

A handy 'Glove Compartment' for your underdeck cockpit space. This storage bag tucks up under the deck and provides quick access to items you may need to keep protected and accessible while on the water. Sunscreen, camera and a snack are just a quick zip away.
- Helps keep your Deck clear to Reduce windage and keep spray out of your face.
- Makes excellent use of secure and dry interior space.
- Pelican scoop opening won't spill contents
- SRB Mounting System(TM) makes it easy to detach and re-attach.
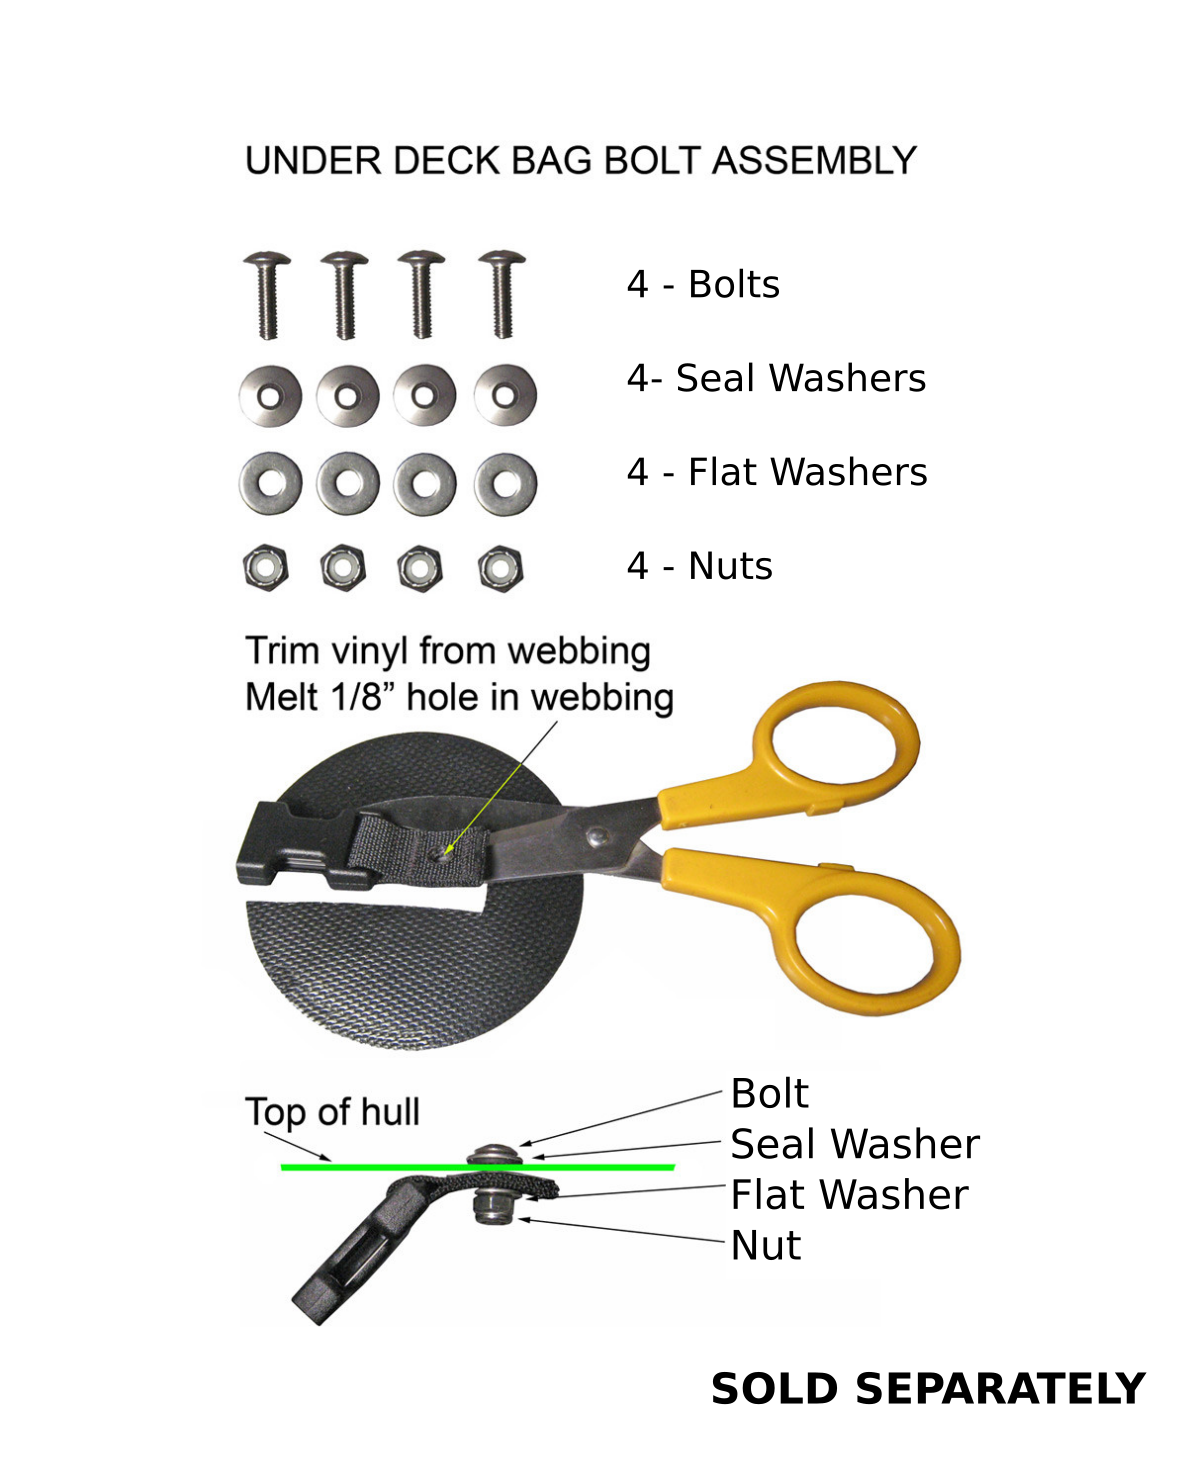
- Optional Bolt on kit for installation in Rotomolded kayaks
- Corrosion resistant #5 YKK Vislon (TM) zipper with 2 zipper pulls
- Mesh drainage panel
- Made with Heavy duty 420D Rip-Stop Pack Cloth
- 15"L x 7"-5"W x 3"H
- Approximately 4.5 L
- Approximately 200 g
Further Information UnderDeck Bag Instructions
NOTE: The SRB Mounting System requires adhesive (not included) and installation appropriate for bonding the hull material to the vinyl patches. North Water Recommends Vinyl Tec 2000 for most composite and thermo-formed hulls.
IMPORTANT: When installing into a polyethylene (roto-molded) kayak, please purchase additional Stainless Steel Mounting Hardware. Click HERE to check it out.